ELEGOO UNO R3 Super Starter Kit: every lesson, simulated
Every lesson of the kit’s tutorial, in its order, as a circuit you can run in your browser with the same parts on the same pins. Open a lesson next to your manual, see it working, then wire it on your bench.
24 of the 24 lessons with a circuit run here, 1 setup lesson needs no circuit.
Not affiliated with ELEGOO. Lesson titles are referenced so you can follow along.
Every lesson in the kit’s order
Lesson numbers and titles follow tutorial V1.0 (2019.09.17), from the download dated 2023.05.05. Each circuit uses the kit’s parts on the pins the lesson uses.
- 0
Installing IDE
No circuitInstalling the Arduino IDE. Nothing to install here: the editor and the compiler run in the browser.
- 1
Add Libraries and Open Serial Monitor
Runs herePrinting from the board to the serial monitor. The libraries the kit uses are already built in.
- 2
Blink
Runs hereThe board’s own LED on pin 13, on for half a second and off for half a second.
- 3
LED
Runs hereAn LED and a resistor on the 5 V pin, no code. Swap 220 ohm for 1k or 10k and see it dim.
- 4
RGB LED
Runs hereRed on pin 6, green on 5, blue on 3: analogWrite fades one color into the next.
- 5
Digital Inputs
Runs hereTwo buttons with the internal pull-ups: one on pin 9 turns the LED on pin 5 on, one on pin 8 turns it off.
- 6
Active buzzer
Runs hereAn active buzzer on pin 12 sounds while the pin is HIGH: quick beeps, then slow ones.
- 7
Passive Buzzer
Runs hereA passive buzzer on pin 8 plays a scale with tone().
- 8
Tilt Ball Switch
Runs hereA ball switch on pin 2 with the pull-up on: tip it and the LED on pin 13 lights.
- 9
Servo
Runs hereAn SG90 on pin 9 jumps to 0, 90 and 180 degrees, then sweeps back.
- 10
Ultrasonic Sensor Module
Runs hereAn HC-SR04 with TRIG on 12 and ECHO on 11, read with the SR04 library, prints centimeters.
- 11
DHT11 Temperature and Humidity Sensor
Runs hereA DHT11 on pin 2 reports temperature and humidity every two seconds.
- 12
Analog Joystick Module
Runs hereX on A0, Y on A1 and the press switch on pin 2, printed to the serial monitor.
- 13
IR Receiver Module
Runs hereAn IR receiver on pin 11 decodes the remote’s buttons.
- 14
LCD Display
Runs hereA 16x2 LCD on pins 7 to 12 says hello and counts the seconds.
The contrast knob is left out: the simulated display is always readable, so V0 goes to ground.
- 15
Thermometer
Runs hereA thermistor on A0 and the beta equation, read out in degrees on the LCD.
The contrast knob is left out: the simulated display is always readable, so V0 goes to ground.
- 16
Eight LED with 74HC595
Runs hereEight LEDs from three pins through a shift register: data 12, clock 9, latch 11.
- 17
The Serial Monitor
Runs hereType 0 to 7 into the serial monitor to light that LED on the shift register, or x to clear.
- 18
Photocell
Runs hereA photocell on A0 sets how many of the eight LEDs light.
- 19
74HC595 And Segment Display
Runs hereOne seven-segment digit through a 74HC595 on pins 2, 4 and 3, counting down from 9.
One 220 ohm resistor on the common pin stands in for a resistor on every segment.
- 20
Four Digital Seven Segment Display
Runs hereA four-digit display on a 74HC595 (pins 8, 10 and 9), every digit on, stepping through 0 to F.
- 21
DC Motors
Runs hereAn L293D runs a motor: speed on pin 5, direction on pins 3 and 4.
The motor runs from the Uno’s 5 V here; on the bench the lesson powers it from the breadboard power module.
- 22
Relay
Runs hereThe L293D drives a relay’s coil, and the relay switches the motor on and off.
The motor runs from the Uno’s 5 V here; on the bench the lesson powers it from the breadboard power module.
- 23
Stepper Motor
Runs hereA 28BYJ-48 on its ULN2003 board, pins 8 to 11, one turn each way.
- 24
Controlling Stepper Motor With Remote
Runs hereVOL+ and VOL- on the remote turn the stepper, with the receiver on pin 12.
Lesson list and pins read from ELEGOO’s tutorial download page. The explanations on this page are our own.
A link and a QR code for this page
Print either one beside a lesson, or tape it inside the box lid. Both open this page.
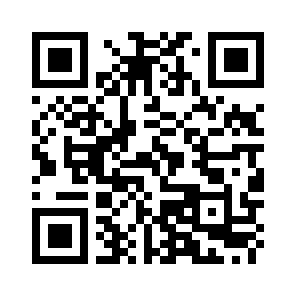
mokxi.com/k/elegoo-super
The code is black on white with a quiet border, so it prints and scans at any size from 2 cm up.
Download the QR code (SVG)Make kits? See what we offer kit makers.
Questions about this page
Is this made by ELEGOO?
No. Mokxi is independent and is not affiliated with ELEGOO. The page follows the kit’s lessons so you can use the two side by side; the circuits, sketches and explanations are Mokxi’s own.
Do I need the kit?
No. Every lesson that runs here runs in the browser, so you can try them before you buy a kit, or keep going while a part is missing or broken.
Is the code the same as in my manual?
The pins and the parts are the same, and the sketches use the same libraries where the kit does. The code itself is written for this page, with comments that explain each step, so it will not match the manual line for line.
What do "with a change" and "coming soon" mean?
A lesson marked "with a change" runs, but something differs from the kit, and the note under it says exactly what. "Coming soon" means we cannot simulate that lesson yet, and the note says why. We do not mark a lesson as running unless it does.
Is it free?
Yes. Every lesson on this page opens with no account. A free account saves your own copies of the circuits.
Start at lesson one
Every lesson opens in the editor with no account and nothing to install. Run it, change a number, run it again.