

Your whole class, building together
Open one circuit with the whole room. Every named cursor moves on the same breadboard, every student runs it on their own machine, and you can bring every screen to your view in one press.
We love teachers. Stuck with anything, a real person answers.
- Chromebooksor any browser, no installs
- 12weeks of course, written
- Freesimulator for every student
Try it before you make an account
Open the same class dashboard a teacher uses, or build a marked lesson in the editor. Both are ready now.
Open the complete teacher dashboard
See the wall, roster, assignments, submissions and gradebook filled with a sample class.
Move through the exact screen you would keep open at the front of the room. Nothing is hidden behind sign-in.
Open the demo classMake the simulator check the work
Turn a circuit into a guided lesson with checks students can run themselves.
Start with a working circuit, write one step, choose what success measures, and preview it as a student.
Write your first lessonExplore first. Create a free account only when you want to keep what you make.
What a class costs
Up to 40 students is the Teacher plan: $129 a year or $14 a month, with 40 student seats included across all your classes. Bigger than that, several teachers, or a whole school or university? Tell us what you need and we'll quote it.
Two ways to get your price
Fill in one short form and get a PDF with your price, ready for a purchase order.
Tell us about your school and we will build the plan with you. A real person replies within one working day.
We love teachers. Stuck with anything, a real person answers.
Paying by purchase order? Talk to us, or .
What your school gets
- The whole room on one project
- A quote for each teacher
- Purchase orders, net-30 invoices
- Data privacy agreement signed
- Help setting up your rosters
- Volume pricing
A class period in 60 seconds
Six presses, one sample class, and every screen below is the product running on this page. Press Next and watch the hour go past.
You assign the starter
One press on the class page and every student has their own copy of your circuit, with the parts and the wiring held. 8 students, 8 copies, nothing to hand round.
Sample students, real circuits, real modules. Every one of these screens is somewhere below, on its own, with what it is for written next to it.
Monday, period three
Thirty students, thirty browser tabs and one circuit you wrote on Sunday. Here's the whole hour, in the order it happens, with what each tool is for written beside it. Six of the seven steps below are the product running on this page: press them. The seventh is a screenshot of it.
Press a part.
The real lock, running here: Lock all is `ui/locks.ts` itself, and the padlocks are the ones a student sees.
Step 1Assign a locked starter
Hand the same circuit to thirty students in one click, and nobody can take it apart.
What you do: open the circuit, press Lock all, assign it from the class page.
Open the circuit the class is going to work on, hold the parts and the wiring, and hand it to the class from the class page. Every student gets their own copy with the same things held.
A held part cannot be moved, rotated, deleted, rewired or retyped by anybody the work was set for. Adding parts, wiring into a held pin and running it are untouched, because that is what they are there to do. Forking the copy does not release it: the copy is theirs, the lock is yours.
The wall itself, over a sample roster. Real circuits, made-up students.
Step 2Watch the wall, not the room
See every screen at once, without walking the room. Press a tile and that student’s work opens beside it.
What you do: open the Wall tab and leave it up. Press a tile to see their circuit running, their sketch, and what they changed.
The class page has a Wall tab: one card a student, with the circuit they have open drawn on it. It is the diagram itself, at rest, redrawn as they save, so nothing on it can be out of date.
It asks every fifteen seconds while you are looking at it, and a card whose circuit has not moved comes back without one. A student who has saved nothing for ten minutes gets the word "stuck?" beside the time. A question, because a student who is thinking looks exactly like a student who is stuck.
- You
Following, running here: the same module the editor uses, on a circuit rather than a room. Press a face, then drag the board.
Step 3Look through one pair of eyes
Look through one student’s eyes without leaning over their shoulder, or put thirty screens on yours.
What you do: in a room, press somebody’s face to follow them, or press Bring everyone here to put the class on your view.
In a room, press somebody’s face and your canvas eases on to their view: their corner of the board, at their zoom, with their pointer showing as a soft ring. A frame in their color and a pill say whose view you are on.
Pan, zoom or touch the canvas and it is yours again, with the pill saying why. Going the other way, Bring everyone here puts thirty screens on your view in one press, and anybody can stop it the same way.
Two Live bars over a room that lives in this page. Press a preset on yours; the student’s bar reads the same clock.
Step 4Put a clock on the wall, and read the hands
Give the room one clock everybody reads, and a queue of who asked first.
What you do: press a preset to start the clock, and take hands down in the order they went up.
Pick 1, 2, 5, 10 or 15 minutes, or type a number, and everybody in the room reads the same clock. The room holds the moment it ends, not a count each machine keeps, so a laptop that slept and somebody who joined halfway through still reach zero together. At zero it flashes once and holds 0:00 until you clear it.
Everybody but you has a Hand up button, and the hands are kept in the order they went up. Your bar reads how many are up and whose, you press a mark to take one down, and Lower all clears the queue between questions.
Changes
1 part and 2 wires added, 1 part moved, sketch changed
Parts added (1)
- btn1 · pushbutton
Parts moved (1)
- led1 · led, moved 60 units
Wires added (2)
- uno1:2 → btn1:1a
- btn1:2a → uno1:GND
Code
uno1 / sketch.ino+10 −4@@ -2,14 +2,20 @@22// The board and the wiring are set. The sketch is yours.3344const int LED = 13;5+const int BUTTON = 2;5667void setup() {78pinMode(LED, OUTPUT);9+pinMode(BUTTON, INPUT_PULLUP);810}9111012void loop() {11-digitalWrite(LED, HIGH);12-delay(500);13-digitalWrite(LED, LOW);14-delay(500);13+if (digitalRead(BUTTON) == LOW) {14+digitalWrite(LED, HIGH);15+delay(120);16+digitalWrite(LED, LOW);17+delay(120);18+} else {19+digitalWrite(LED, LOW);20+}1521}Added in the accent, deleted ghosted where the starter had it, moved with an arrow.The panel itself, over a sample starter and a sample submission. The diff is worked out here, on this page.
Step 5Read what changed, not what was submitted
Grade a class of blink assignments in minutes: one line per student saying what they did to your circuit.
What you do: scan the lines under the assignment, and press Changes on the one you want to see drawn.
Each student works on a copy of your circuit, so the useful question is what the student did to it. Under every project assignment the class page lists one line per student: parts and wires added, removed and moved, properties changed, notes written, and the sketch line by line. You can scan a whole class without opening each project.
Changes opens the rest, with the differences drawn on their own board: added things glow, deleted things sit dashed where yours had them, and a part that was dragged has an arrow from where it started. What you held is left out of the count, because a lock is how the work was set, not work the student did.
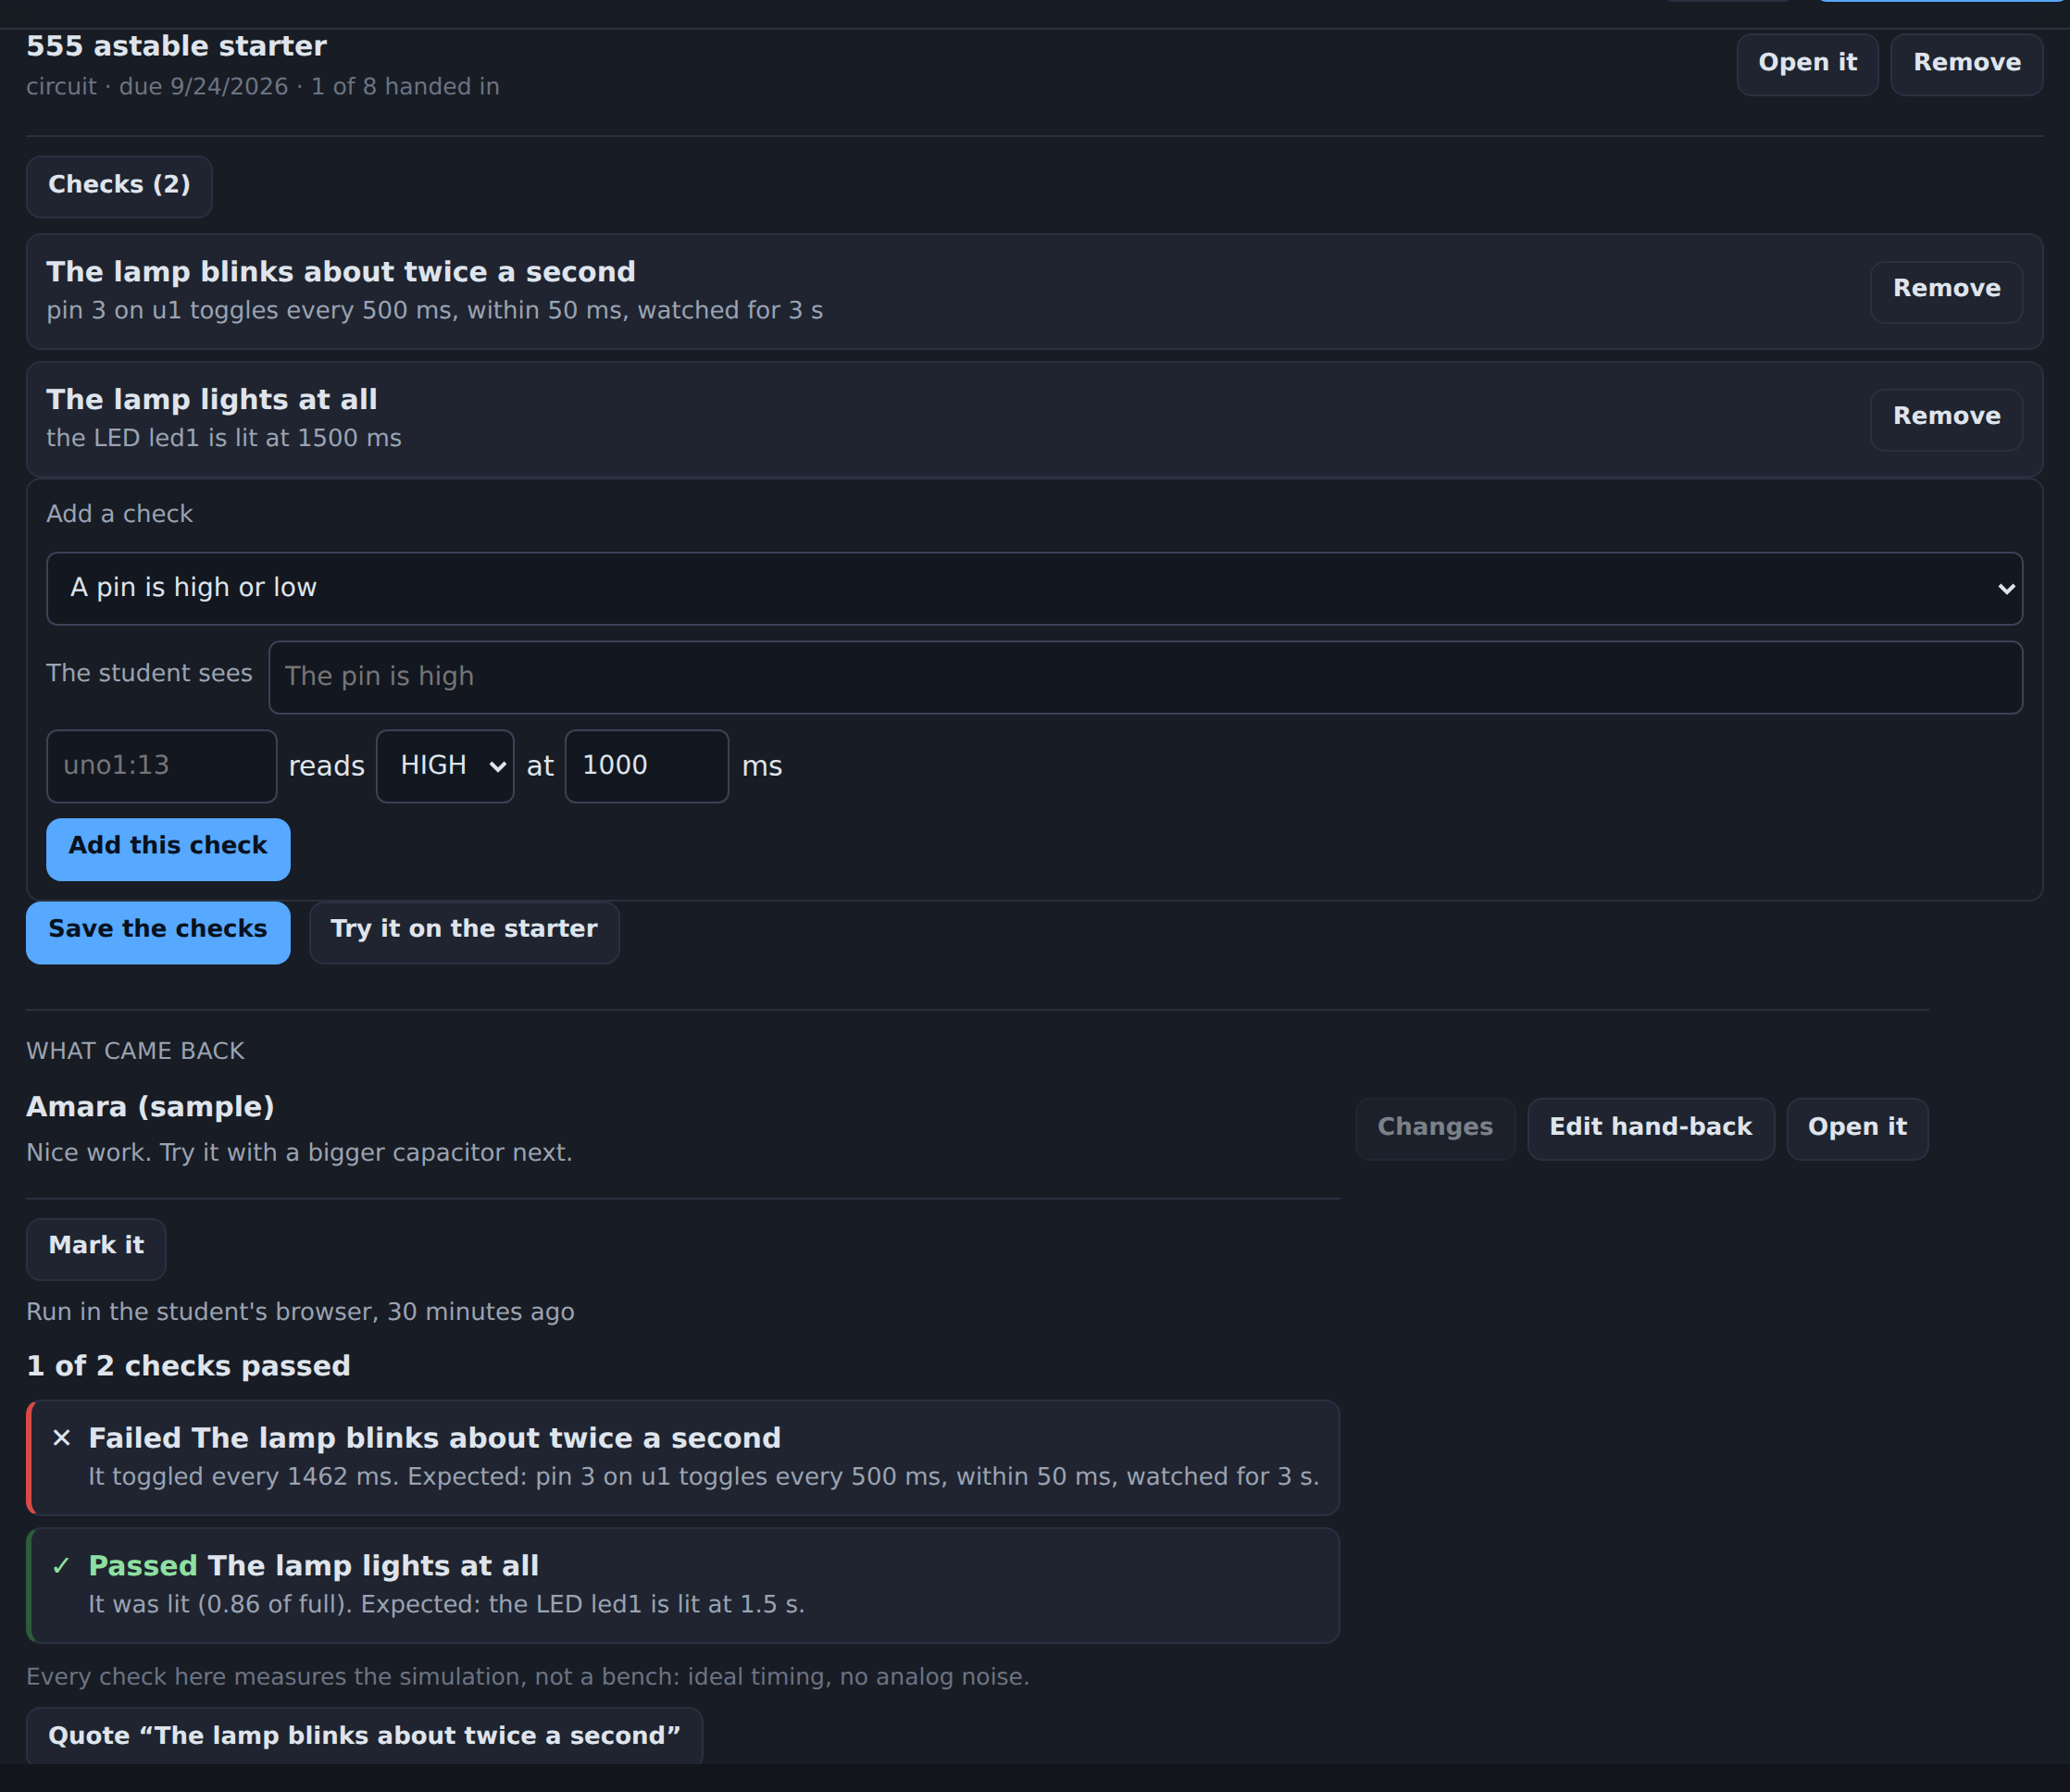
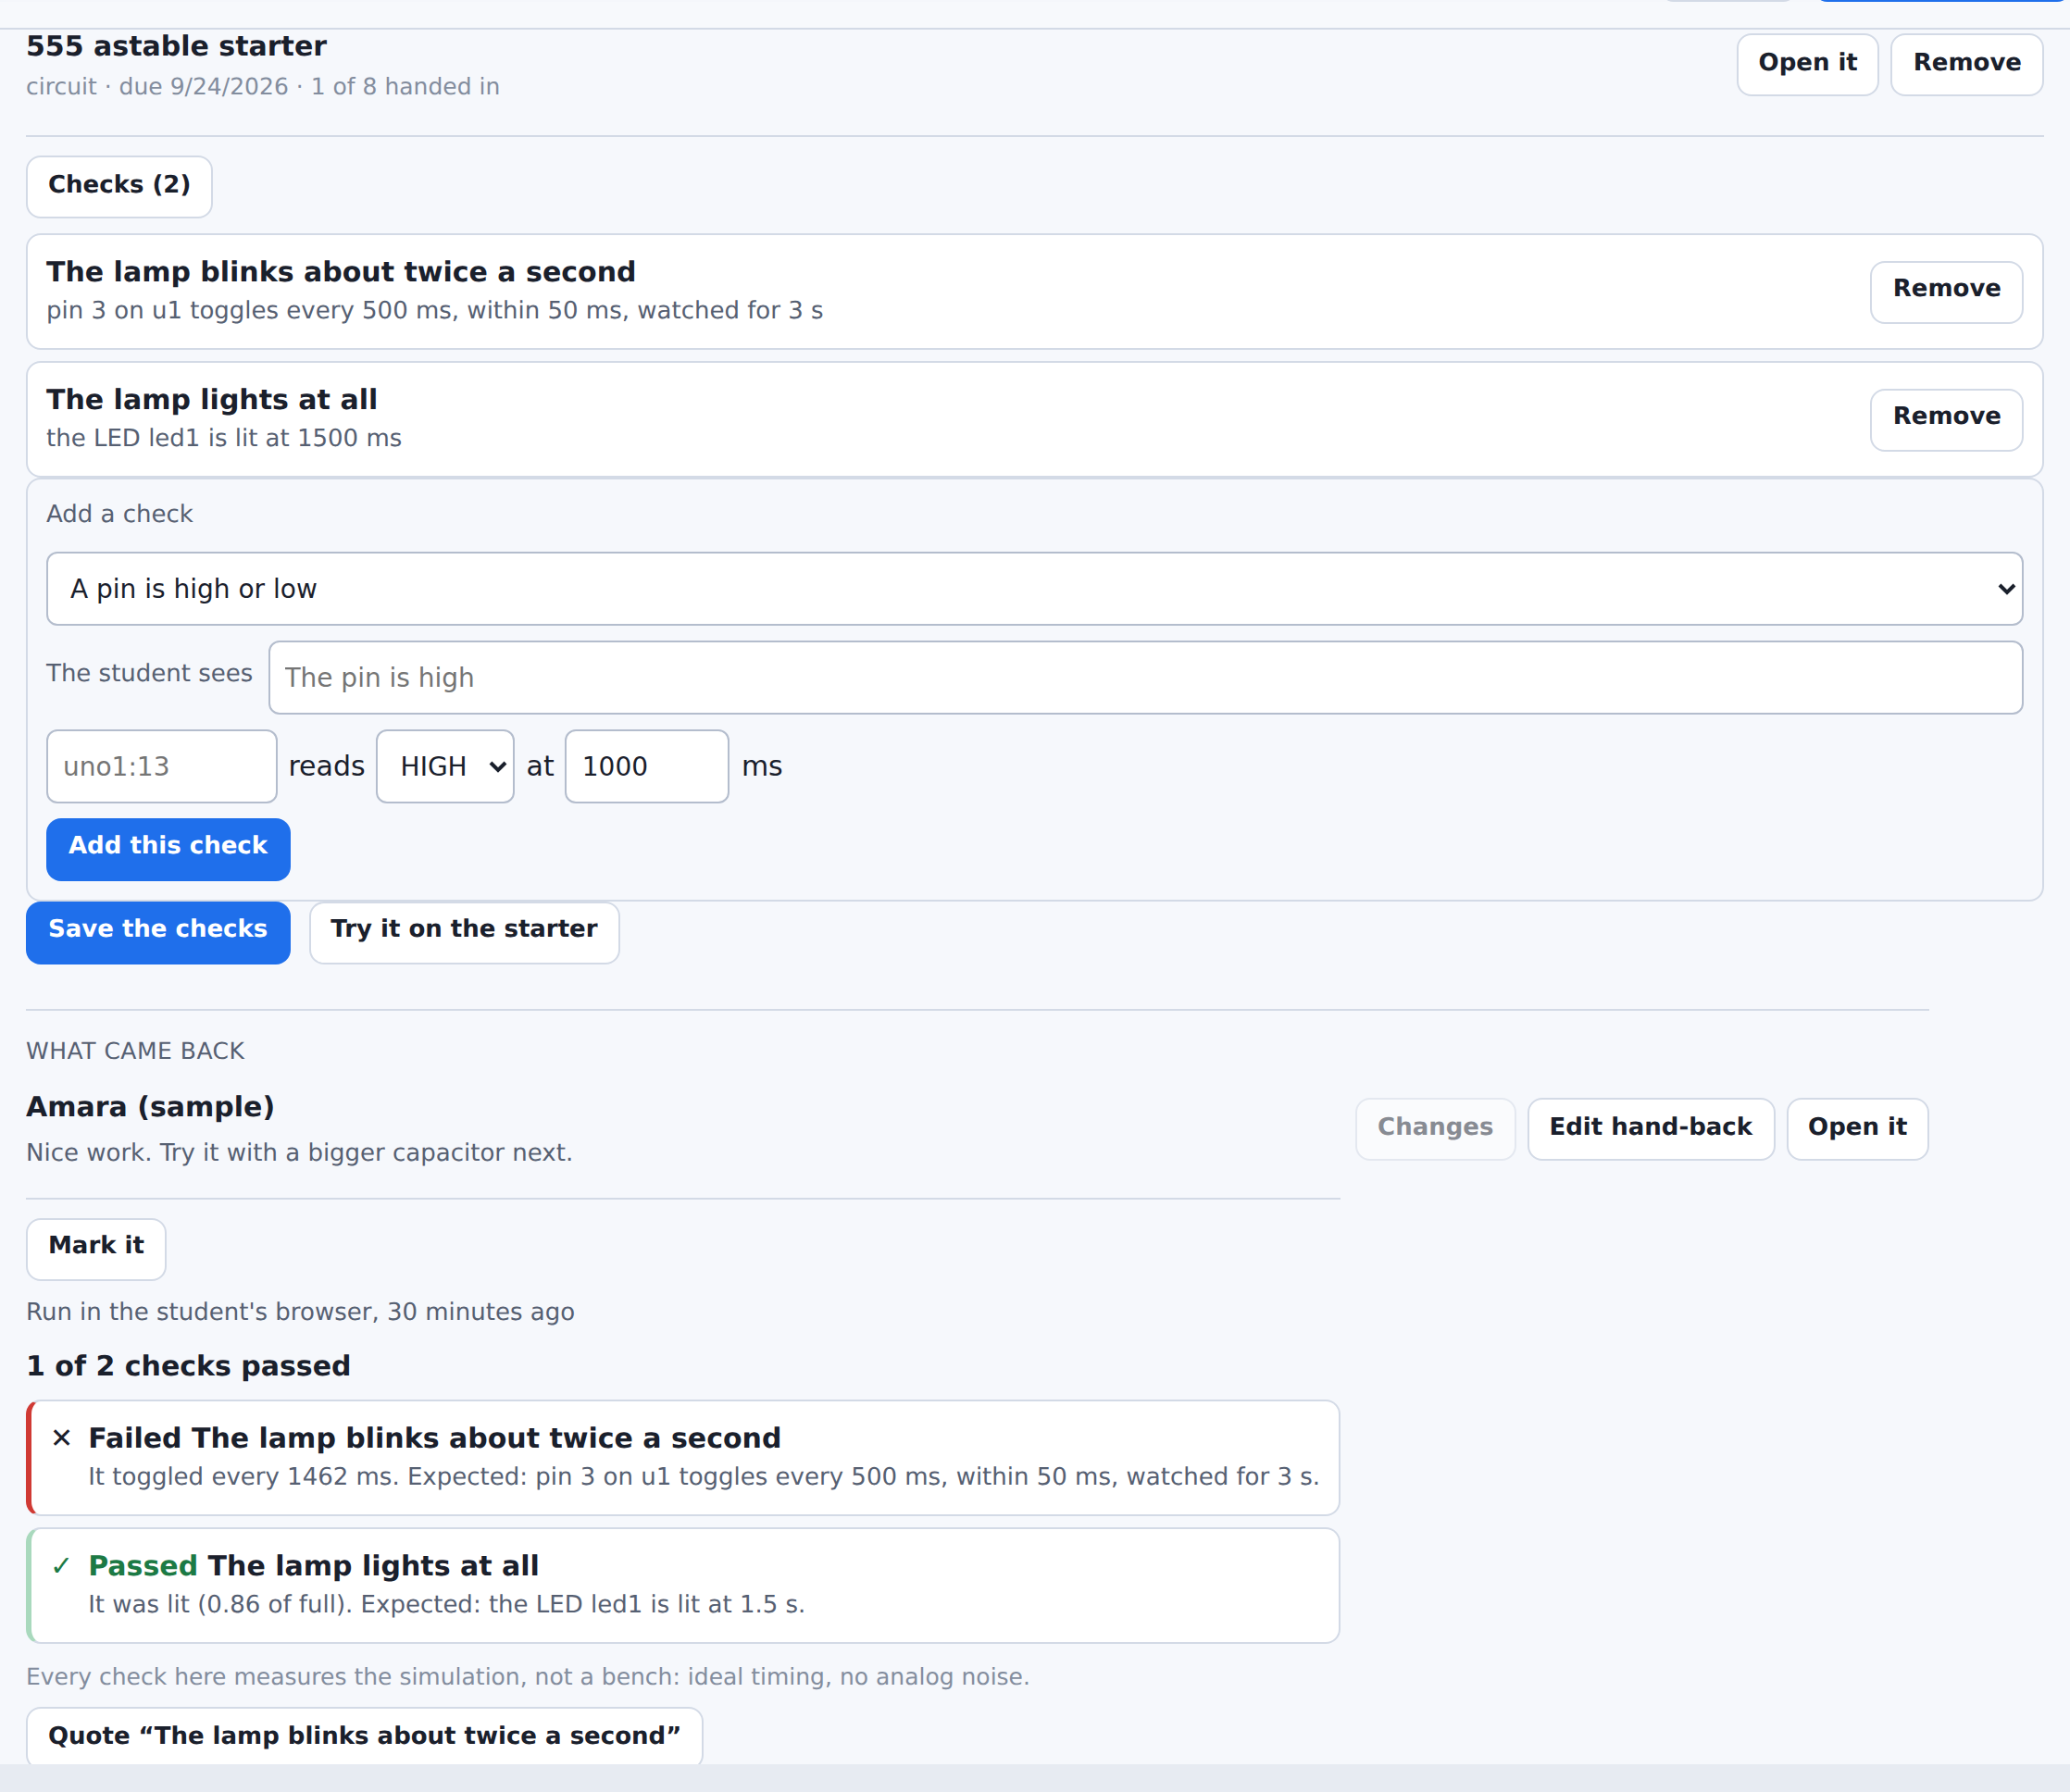
The editor itself, shot from the sample class. A check measures the simulation: ideal timing, no analog noise.
Step 6Grade it once, not thirty times
Write the checks once, and every submission measures itself against them on the real engine.
What you do: open Checks under the assignment, fill the gaps in a few sentences, press Try it on the starter, then Save.
Under an assignment, Checks: a short list of things you expect the circuit to do, each one a sentence you fill the gaps in. Pin 13 blinks every 1000 ms, within 50. The serial monitor prints a line matching this. Press this button, then that pin goes high. The sketch builds.
Try it on the starter runs the list against your own answer before the class ever sees it, so a check that does not pass on the solution never gets assigned. Then every student gets Check my work, which runs the same list on the real engine in their own browser and tells them what it measured beside what you asked for: it toggled every 1462 ms, expected every 1000. The score comes back on the wall and on the submission, a failed check drops into your comment in one press, and Mark it re-runs the lot on your machine when the marks have to be yours rather than theirs.
- Your sideWhat Chidi opensNo feedback yet.
The box itself, working here. Nothing is sent: the note stays in this page and the student’s side of it is drawn beside it.
Step 7Send feedback
Leave a line on a student’s work, and it is on their own page the next time they open it.
What you do: press Send feedback, write the line, press Save. Editing it replaces it.
Next to Changes on every submission, Send feedback opens a box: write a line, save it, and it is on the student’s own class page the moment they next open it. Use it for what to try next, what stood out, or a nudge toward the part they left off.
Editing replaces what was there rather than piling comments up, so a submission carries one note, always the newest. It is signed as you, and the same class rules that hold a starter say who else may write it: nobody but the teacher.
Before any of that: filling the class
Fill a class of thirty without a form, a letter home or a single account made by you.
What you do: make the class, read the six-character code out, and send the link. They type it once and the class is on their page from then on.
Nobody has joined yet
The wall fills itself the moment somebody joins. Send the link below, or read the code out: a student types it once at /class and this class is on their page from then on.
http://127.0.0.1:5199/class?code=SAMPLEOr read out the code: SAMPLE
A class with nobody in it yet, drawn by the page that draws yours. The code is a sample one; the link and the Copy button are the real ones.
And what they are actually building
Simon: four LEDs flash a growing sequence and four buttons play it back, on a real ESP32-C3 core running real firmware.
What you do: press Run it, watch the sequence, then press the buttons back in order. This is Eli’s circuit from the wall above.
Twelve weeks, mapped to circuits that run
An introduction to electronics and embedded programming, week by week, starting from zero. Each week has objectives, a circuit to open, an exercise and an assessment idea, and every circuit in it exists today.
- Current, voltage and the breadboardHello, breadboard
- Blink: the first programArduino Uno blink
- Buttons, pull-ups and contact bounceESP32-C3 button
- Timing without a processor: the 555555 blinker
- Logic gates, as real chipsGate lab
- Arithmetic from gates: the full adderFull adder
- Memory: flip-flops and countersBinary counter
- More outputs than pins: the shift registerLED bar chaser
- Pulse width modulation and the eyeBreathing LED
- Serial: making the board talkESP32-C3 serial
- Interrupts: events instead of pollingReaction timer
- Project week: two boards, one wireTwo boards, one wire
What a school gets
Everything the free plan has, which is the whole simulator, everything in Teacher for every student, and then the things a school with more than 40 students needs. Priced for you, in a written quote.
- ✓The whole room on one project
- ✓A quote for each teacher
- ✓Purchase orders, net-30 invoices
- ✓Data privacy agreement signed
- ✓Help setting up your rosters
- ✓Volume pricing
A seat is a student. A teacher’s own place in the class is not one of them and is not charged for, so thirty seats is a class of thirty-one with the teacher in it.
A real person replies within one working day. Or get a written quote in minutes.
What it saves on hardware, honestly
A class of 30 over 3 years, at US list prices checked September 23, 2026. The kit and instrument prices are sourced; the breakage and upkeep figures are our guesses, and you can change every one of them.
What happens to student work
The questions your district’s privacy review asks, answered plainly, from what the code actually does.
A circuit is never uploaded to run
The simulation, the CPU cores and the compiler all run in the browser tab. A project leaves the machine only when somebody asks it to: saved to an account, shared by link, opened in a room, or submitted.
A student can work with no account at all
The editor, the lessons and a shared project link all open signed out, with nothing stored about the reader beyond what their own browser keeps. An account is only needed to save work to the cloud, to join a class and to submit work.
What an account holds
The sign-in identity from GitHub, Google or an email address and a hash of its password; the name, address and avatar that came with it; the projects saved, with their saved versions; and lesson progress. The student data privacy page has the full list, row by row.
What a class holds
The class name and its join code, which accounts joined it, what was assigned and what was returned with feedback. Nothing about a student that they did not put there themselves.
A project is private until its owner says otherwise
Every project is created private and stays private. One exception, and only for reading: a teacher may open, and never write, a project owned by somebody in a class they teach, which is what a card on the wall does.
We sign your data privacy agreement
The SDPC National Data Privacy Agreement or your state’s version of it. Student data is never sold or used for advertising, and no analytics or ad tag loads for a student in a class.
Questions
Do students need accounts?
No. The simulator works signed out, so your class starts from one link with nothing to sign up for. An account only adds cloud saving and sharing, and a student can make one later, or never.
Is there anything to install?
Nothing. It is a web page. There is no extension, no runtime, no driver and no administrator request.
Does it work on a Chromebook?
Yes. Everything runs on the machine in front of the student, so a Chromebook works as well as a lab PC.
Does it work on a phone or a tablet?
Yes. The editor uses pointer events, targets big enough to hit, and a layout that stacks on a narrow screen.
What does it cost for a class?
Nothing, if your students only need to open and run circuits: the whole simulator is on the free plan. The class tools (a roster, starter projects, auto-graded checks, the gradebook) come with Pro and the Teacher plan. For one teacher, the Teacher plan is $129 a year or $14 a month with forty student seats included, for as many classes as you like, and your students get Pro’s room while they are in them. For more than forty students, several teachers, a school, a district or a university, we price it for you: talk to us, or type your number into the calculator on this page for a written quote in minutes. Pro on its own runs as many classes as you like for up to ten students. To try the class tools with real students first, start the free 30-day trial from your class page: one class of up to forty students, no card.
What is actually simulated?
A real breadboard on a 0.1 inch grid, the parts, and an Arduino Uno, ESP32-C3, Pico or STM32 running firmware built from the student’s own C++. Timers, interrupts and PWM behave the way the chip does, because the core carries the datasheet cycle counts.
Is student work private?
Yes. A project is private when it is created and stays private until the student makes it public. One exception, and only for reading: a teacher may open, and never write, a project owned by somebody in a class they teach, which is what a card on the class wall does. What we store about a student, who processes it, how a school has it deleted, and how we handle COPPA consent for students under 13 and FERPA as a school official are all on the student data privacy page at /privacy/students.
Will you sign our data privacy agreement?
Yes. We sign school and district student data privacy agreements, including the SDPC National Data Privacy Agreement and the state versions of it, and we answer security questionnaires. Student data is never sold or used for advertising. Ask on the support page or by email, and the IT setup page at /schools/it has the domains to allow and the Google Workspace setting for students under 18.
Can students take their work with them?
Yes. Any project saves to a file and opens again anywhere, so their portfolio does not depend on us still being here in five years.
Is there a curriculum, or do I build the course myself?
There is a 12-week course on the curriculum page. Each week has objectives, a circuit that runs today, an exercise and an assessment idea. Take it whole, reorder it, or use it as the outline for your own.
Are there printable lesson plans?
Yes. Every week on the curriculum page has a one-page PDF lesson plan with the objective, the parts, the steps, a picture of the circuit and an assessment idea. The page sets the same things out as text, ready to copy into whatever plan format your department already uses.
How many seats does a class of thirty need?
None to count: the Teacher plan includes forty student seats across all your classes for one price, so a class of thirty fits with ten to spare, and your own seat is on us. You can pay by card straight from the calculator on this page. More than forty students, or several teachers, gets a written quote instead.
Can I pay with a purchase order?
Yes. Type your number of students into the calculator on this page and fill in the quote form under it: give the school, the billing contact and address and your PO number, and the quote comes back at once as a PDF, payable by invoice on net 30 terms. Our W-9, tax id and address are on the vendor information page. A single teacher with up to forty students can pay for the Teacher plan by card right away; for a purchase order on a class that size, talk to us.
Ask for a walkthrough
Tell us where to reach you. We’ll show you how Mokxi fits your class and answer your school’s questions.