Thermal receipt printer
Text, bold, inverse, double size and barcodes on a paper roll, over TTL serial at 19200 baud.
- 5 pins
- 2 settings
- In 1 project
- In 1 lesson
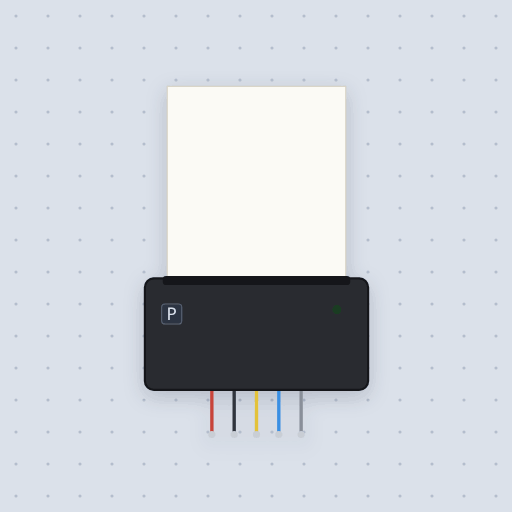
The Thermal receipt printer in brief
What it is, and every setting the properties panel gives it.
The mini thermal printer, the CSN-A2 type, prints on 58 mm heat-sensitive paper with a 384-dot head and takes text and commands over a TTL serial port, 19200 baud by default. Text goes into a line buffer as it arrives and prints when a line feed comes or the line is full, and commands in between change how the next text looks. Mokxi follows those rules. A line is 32 characters, or 16 in double width, and a longer one wraps. It handles bold, double height and width, the size command, inverse, underline, left, center or right justification, feeding in lines or dots, and a barcode printed with its digits. A bitmap’s data is taken in full and shows as a placeholder with its size. The status request answers on TX with bit 2 set when the paper is out, which is how hasPaper() knows, and the P button takes the paper out and puts it back. The time a line takes, the darkness of the print and the character sets are not modeled.
- Family
- Outputs
- Pins
- 5
- baud
- 19200
- paper
- true
5 pins
Named as the editor names them, so a wire lands where you expect it.
How to wire and drive a mini thermal printer from an Arduino
The printer needs two things the Uno cannot give: its own supply, 5 V to 9 V on VH, and a serial link. The head pulls well over an amp at peaks, so VH comes from a 9 V supply and never from the Uno’s 5 V pin, with the grounds joined. The printer’s RX goes to Uno pin 6, the Uno’s transmit pin, and the printer’s TX goes to pin 5. The project uses SoftwareSerial on 5 and 6 because pins 0 and 1 belong to the USB serial monitor. DTR is not used.
Each ticket in the project is a button press. justify('C') centers, boldOn() and setSize('L') make the header, and println() prints each line. printBarcode(code, CODE39) prints the lucky number as a barcode with its digits under it. Remember the line buffer: text is held until a line feed, so a missing println() prints nothing. A line of 32 characters fits, and a longer one wraps, while double width halves that to 16.
The TX wire is optional, and it is how the library asks for status. The printer answers with bit 2 set when the paper is out, which is what hasPaper() reads. Press P on the part to take the paper out and put it back, and the sketch can see it. The simulation does not time the print, so a ticket appears faster than the real head would draw it.
Any board with a spare serial port can drive it: use Serial1 on a Mega or ESP32 instead of SoftwareSerial, and power VH separately in every case.
#include <Adafruit_Thermal.h>
#include <SoftwareSerial.h>

SoftwareSerial printerSerial(5, 6);   // RX, TX
Adafruit_Thermal printer(&printerSerial);

void setup() {
  printerSerial.begin(19200);
  printer.begin();
  printer.justify('C');
  printer.boldOn();
  printer.setSize('L');
  printer.println("FORTUNE");
  printer.setSize('S');
  printer.boldOff();
  printer.println("--------------------------------");
  printer.feed(2);
}

void loop() {}
Common Thermal receipt printer errors and fixes
Questions and answers
How many characters fit on a line of a mini thermal printer?
Thirty-two in the normal width and 16 in double width. A longer line wraps onto the next. The head has 384 dots across 58 mm paper.
Why does a thermal printer need its own power supply?
The head heats many dots at once and pulls more than an amp at peaks, more than an Arduino’s 5 V pin can give. VH takes 5 V to 9 V from a separate supply.
Which library prints barcodes and bold text?
Adafruit_Thermal. boldOn(), setSize(), justify() and printBarcode() do it, and the project uses all four. Mokxi compiles the library.
Does Mokxi model the print time or the darkness?
No. Lines, styles, feeding, barcodes, bitmaps as a placeholder and the paper-out status are modeled, but not the time a line takes, the heat setting or the character sets.
What is true about the Thermal receipt printer, here
In its help article’s own words: what the simulation gets right, and where it stops.
Modeled
Lines. Text prints on a line feed; a carriage return is ignored; a line is 32 characters, 16 in double width, and a longer one wraps.
Styles. Bold, double height and double width (the print mode), the size command, inverse, underline, and left, center or right justification.
Feeding, barcodes and bitmaps. Feeding lines or dots, a barcode printed with its digits, and a bitmap's data taken in full (it shows as a placeholder with its size).
Status. The status request answers on TX, with bit 2 set when the paper is out,
which is how the library's hasPaper() knows.
Not modeled
The time a line takes to print, how dark the heat settings make the print, the character sets, the bitmap's picture itself, and DTR flow control.
From Thermal receipt printer, in full.
See the Thermal receipt printer in a project
One built-in project uses it. It opens in the editor, already wired.
Where it turns up in a lesson
One lesson places it in its own circuit.
The boards it is shown on
This board has a built-in project with the Thermal receipt printer in it.
Arduino libraries for the Thermal receipt printer
Built in, so the sketch compiles with nothing to install. Each page has the calls, the wiring and an example to run.
The rest of the bench
Every one of these is drawn and simulated the same way.
Wire up the Thermal receipt printer
Open the editor and push it into the breadboard. It is free, and it runs on your own machine.