Solenoid
A coil and a plunger. It needs a transistor, and a diode across it for the kick when it lets go.
- 2 pins
- 8 settings
- In 7 projects
- In 1 lesson
The Solenoid in brief
What it is, and every setting the properties panel gives it.
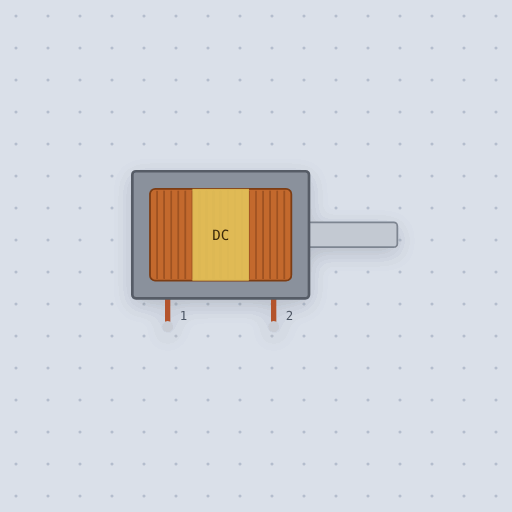
A push-pull solenoid is a coil around a steel plunger that is pulled in while current flows and springs back out when it stops. It is the simplest actuator there is, and the part that teaches the flyback diode, because it is an inductor with a moving core. The Mokxi coil is an inductance in series with its winding resistance, solved in the circuit’s matrix, so the current builds with the L over R time constant and the kick when it is switched off comes out of the same equations. The default is a 12 V coil of 40 ohms and 30 mH, which draws 300 mA, far more than a pin gives. The plunger moves in when the current passes 75 percent of rated and releases at 15 percent, with a travel time each way. Two named models are included, a 12 V door lock and a 12 V water valve. The way the inductance rises as the plunger closes, the force over the stroke and heat are not modeled.
- Family
- Outputs
- Pins
- 2
- model
- custom (or 12V door lock, 12V water valve)
- voltage
- 12
- resistance
- 40
- inductance
- 30
- pull
- 0.75
- release
- 0.15
- pull_ms
- 15
- release_ms
- 10
2 pins
Named as the editor names them, so a wire lands where you expect it.
How to drive a solenoid from an Arduino
A pin cannot drive the coil: it draws 300 mA at 12 V for the default part. So the pin goes to the gate of a logic-level MOSFET, an IRLZ44N in the project, and the transistor switches the coil. One coil lead goes to the 12 V supply, the other to the drain, the source goes to ground shared with the Uno, and a 1N4007 diode sits across the coil with its cathode on the supply side. The sketch then taps once a second, HIGH to pull the plunger in and LOW to let it go.
The diode is the point of the circuit. A coil’s current cannot stop at once. When the MOSFET turns off, the coil keeps pushing and the voltage at the drain climbs until something conducts. With no diode that is the transistor itself, at hundreds of volts. With the diode the current circulates through the coil and diode, the drain sits one drop above the supply, and the current dies away over a few milliseconds. Put a meter on the drain, remove the diode, and watch.
The coil has no polarity, so either lead can go either way. Change the model to the door lock, 18.5 ohms and 650 mA, and the same driver now has to carry twice the current. The lock is rated for 1 to 10 seconds on at a time, which the simulator does not enforce.
A 3.3 V board needs a MOSFET that is fully on at 3.3 V, so check the gate threshold, or use a driver module, before trusting the part number.
const int SOLENOID = 9;

void setup() {
  pinMode(SOLENOID, OUTPUT);
}

void loop() {
  digitalWrite(SOLENOID, HIGH);   // plunger in
  delay(100);
  digitalWrite(SOLENOID, LOW);    // the diode carries the kick
  delay(900);
}
Common Solenoid errors and fixes
Questions and answers
Why does a solenoid need a diode?
A coil’s current cannot stop at once, so switching it off makes a voltage spike at the switched end. The diode gives the current a path, keeping the spike to one diode drop above the supply.
Can an Arduino pin drive a solenoid directly?
No. The default 12 V coil draws 300 mA, and a pin gives a small fraction of that. Use a logic-level MOSFET such as the IRLZ44N.
What do the pull and release settings mean?
They are the fractions of the rated current at which the plunger starts in (0.75) and starts back out (0.15). pull_ms and release_ms set how long each travel takes.
Does it model the force of the plunger?
No. The model gives the current build-up, the kick on switch-off and the plunger’s on or off state. The force over the stroke, heat in an overdriven coil and what the plunger hits are not modeled.
What is true about the Solenoid, here
In its help article’s own words: what the simulation gets right, and where it stops.
Modeled
The coil is an inductance in series with its winding resistance, solved in the circuit's matrix, so the current builds with the L/R time constant and the kick on switch-off comes out of the same equations. The plunger follows the "must operate" and release figures small solenoid datasheets give, with a travel time each way. A diode across the coil slows the release, as it does on the bench.
Not modeled
The inductance rising as the plunger closes the gap (the dip in the current that tells a driver the plunger moved), the force over the stroke, heat in an overdriven coil, and whatever the plunger hits.
From Solenoid, in full.
See the Solenoid in a project
7 built-in projects use it. Each opens in the editor, already wired.
Where it turns up in a lesson
One lesson places it in its own circuit.
The boards it is shown on
This board has a built-in project with the Solenoid in it.
The rest of the bench
Every one of these is drawn and simulated the same way.
Wire up the Solenoid
Open the editor and push it into the breadboard. It is free, and it runs on your own machine.