Microwave motion sensor
A microwave radar that sees movement through plastic and thin walls. OUT holds 3.3 V for two seconds after.
- 5 pins
- 1 setting
- In 3 projects
- In 2 lessons
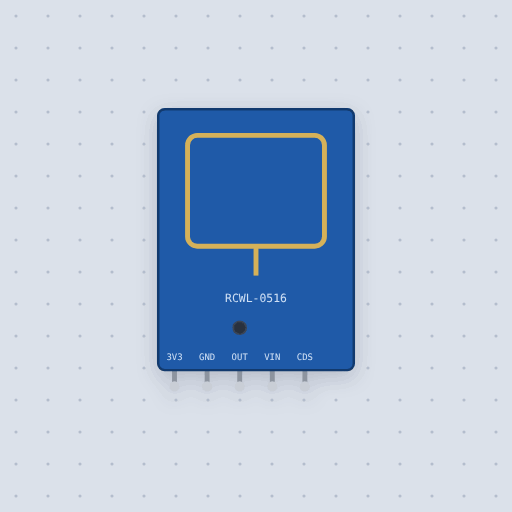
The Microwave motion sensor in brief
What it is, and every setting the properties panel gives it.
The RCWL-0516 is a small blue Doppler radar board: a 3.2 GHz oscillator and printed antenna on one side and an RCWL-9196 chip on the other, so it sees movement through plastic, glass and thin walls, with no lens. Its pins are 3V3, GND, OUT, VIN and CDS. VIN takes 4 to 28 V, so on an Uno it runs from 5 V with OUT on pin 2, and on an ESP32 from the 5 V (VIN) pin with OUT on any GPIO, since OUT swings to the board’s own 3.3 V. There is no library, only digitalRead. Mokxi raises OUT the moment something moves, keeps it high while the movement continues, and drops it hold seconds after it stops, 2 by default as on the stock board. Unlike the HC-SR501 PIR there is no dead time after a pulse. CDS pulled below about 0.7 V turns it off, and 3V3 is a 3.3 V source while VIN is powered. Click it to start or stop movement. The classic mistake is feeding VIN 3.3 V, under its 4 V minimum. Range, what lies in the way and false triggers from fans or a second sensor are not modeled.
- Family
- Sensors
- Pins
- 5
- hold
- 2
5 pins
Named as the editor names them, so a wire lands where you expect it.
How to use the RCWL-0516 radar sensor with an Arduino
Five pads: 3V3, GND, OUT, VIN and CDS. VIN wants 4 to 28 V, so it takes 5 V, never the 3.3 V pin; GND goes to GND and OUT to pin 2. Leave 3V3 and CDS unconnected. OUT swings to the board’s own 3.3 V, which an Uno reads as HIGH, so there is no library and no level shifter, only digitalRead(2).
Click the sensor to start something moving and the Uno’s LED on pin 13 lights at once; click again and it goes out two seconds later, the board’s hold time, which the serial monitor measures. Start the movement again just after the LED goes out and it lights at once, because unlike a PIR it has no dead time. It also sees through plastic, glass and thin walls, so on a real build point it away from the next room.
On an ESP32, power VIN from the 5 V (VIN) pin; OUT at 3.3 V goes straight to any GPIO.
bool seen = digitalRead(SENSOR_PIN) == HIGH;
digitalWrite(LAMP_PIN, seen ? HIGH : LOW);What is true about the Microwave motion sensor, here
In its help article’s own words: what the simulation gets right, and where it stops.
Modeled
OUT rises at once to the board's 3.3 V, continued movement keeps it high, and
it drops hold seconds after the movement stops (2 s with the stock board).
Unlike a PIR there is no dead time after a pulse and no single-shot jumper.
CDS pulled low turns the sensor off, and 3V3 is a 3.3 V source while VIN is
powered.
Not modeled
The range (about 7 m) and what is in the way: something is either moving in range or it is not. False triggers from fans, vibration or a second sensor nearby.
From RCWL-0516 microwave motion sensor, in full.
See the Microwave motion sensor in a project
3 built-in projects use it. Each opens in the editor, already wired.
Where it turns up in a lesson
2 lessons place it in their own circuits.
The boards it is shown on
Each of these 2 boards has a built-in project with the Microwave motion sensor in it.
The rest of the bench
Every one of these is drawn and simulated the same way.
Wire up the Microwave motion sensor
Open the editor and push it into the breadboard. It is free, and it runs on your own machine.