Thermal camera, AMG8833
An 8x8 grid of temperatures ten times a second over I2C at 0x69.
- 5 pins
- 4 settings
- In 1 project
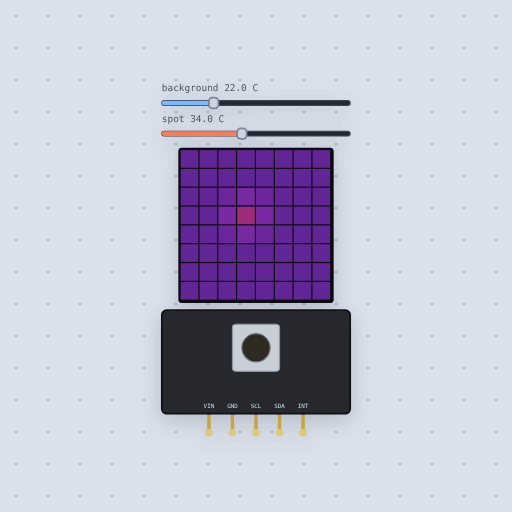
The Thermal camera, AMG8833 in brief
What it is, and every setting the properties panel gives it.
The AMG8833 Grid-EYE is an 8x8 thermal camera: sixty-four thermopile pixels, one patch of the scene each, over I2C at up to ten frames a second. The common breakout has VIN, GND, SCL, SDA and an optional open-drain INT pin, and takes 3 to 5 volts, so on an Uno it goes to 5 V with SDA on A4 and SCL on A5, and on an ESP32 to 3.3 V with GPIO 21 and 22. Its address is 0x69, or 0x68 with the AD pin low, a property. Mokxi models the registers from the Grid-EYE specification: twelve-bit pixels in quarters of a degree from 0x80, the thermistor at 0x0E, a new frame every 100 milliseconds at the fast rate, and the absolute interrupt that pulls INT low when a pixel crosses its levels. The scene is a background temperature and one warm spot you click onto the grid, and the Adafruit_AMG88xx library reads it with readPixels. The usual mistake is reading all 128 pixel bytes at once on an Uno, whose Wire buffer holds 32. Frame-to-frame noise and the difference interrupt mode are not modeled.
- Family
- Sensors
- Pins
- 5
- address
- 105
- background
- 22
- spot
- 34
- pixel
- 27
5 pins
Named as the editor names them, so a wire lands where you expect it.
How to use the AMG8833 thermal camera with an Arduino
Wire VIN to 5 V, GND to GND, SDA to SDA and SCL to SCL; on an Uno those are the same signals as A4 and A5. The breakout answers at 0x69, which is where the Adafruit AMG88xx library looks by default, so amg.begin() needs no address unless the AD pin is tied low.
Read a frame with amg.readPixels(pixels) into an array of 64 floats, row by row from the top left. A new frame arrives every 100 ms, so there is no point reading faster. The thermal camera example finds the hottest pixel and repaints only the squares whose color changed, because pushing a whole picture to the screen takes far longer than reading it.
On an ESP32 power it from 3.3 V and use the board’s I2C pins, GPIO 21 for SDA and 22 for SCL on a classic DevKit; the library call is the same.
What is true about the Thermal camera, AMG8833, here
In its help article’s own words: what the simulation gets right, and where it stops.
Modeled
From the Grid-EYE specification:
The registers. Power control, reset, frame rate, interrupt control and status, the interrupt levels, the thermistor at 0x0E and the sixty-four pixels from 0x80.
The formats. Pixels are twelve-bit two's complement in quarters of a degree; the thermistor is twelve-bit sign and magnitude in sixteenths.
The frames. A new frame every 100 ms at ten frames a second, every second at one, none while asleep.
The absolute interrupt. A pixel over the upper level or under the lower one sets
its bit in the table and pulls INT low until the flag is cleared.
Not modeled
The scene is Mokxi's: a background and one spot that spreads half its difference to the pixels beside it and a quarter to the corners. A real sensor is noisy by about a degree from frame to frame; this one is not. The difference interrupt mode, the hysteresis and the moving average are stored but do nothing. The thermistor reads the background, standing in for the room.
From Thermal camera, AMG8833, in full.
See the Thermal camera, AMG8833 in a project
One built-in project uses it. It opens in the editor, already wired.
The boards it is shown on
This board has a built-in project with the Thermal camera, AMG8833 in it.
The rest of the bench
Every one of these is drawn and simulated the same way.
Wire up the Thermal camera, AMG8833
Open the editor and push it into the breadboard. It is free, and it runs on your own machine.